Read the transcript to the above video:
From one of our previous movies you know how shutter speed works. Now you´ll learn how to use it.
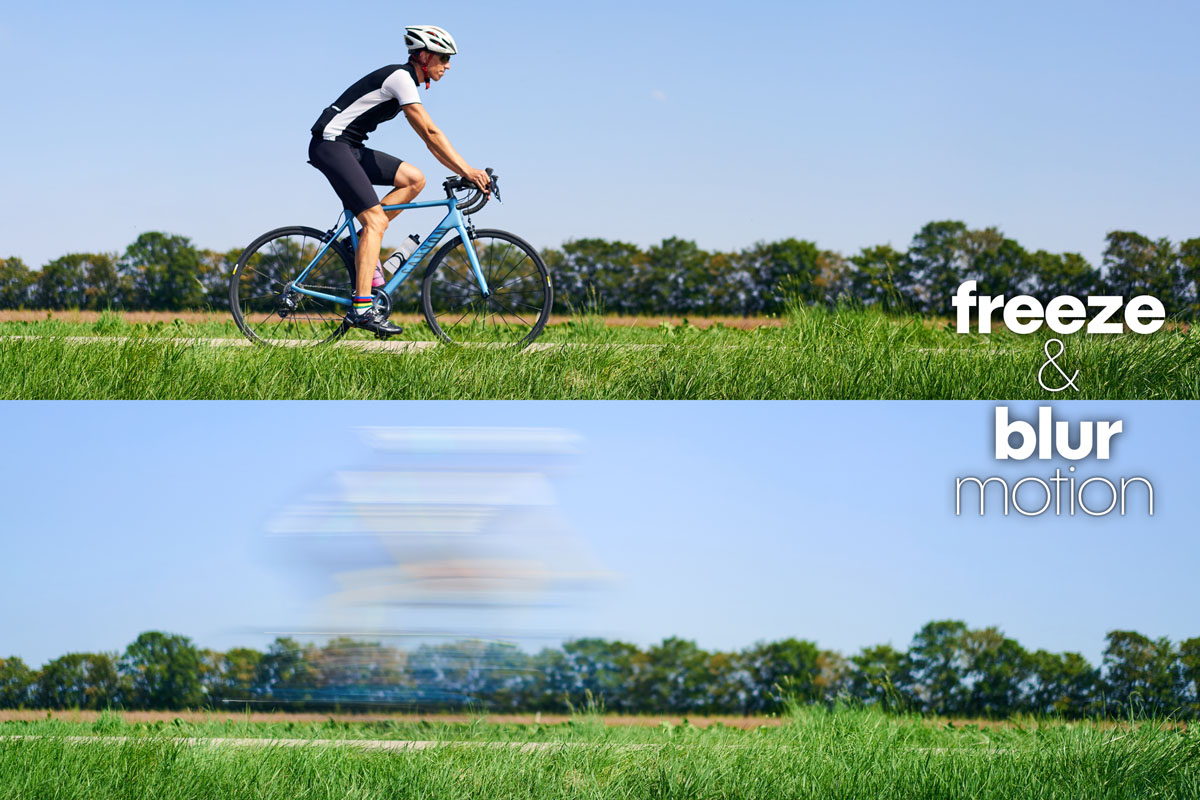
Creative use of shutter speed can either blur the action in your image or freeze it. These two images show you what the exact difference is.
Pretty cool, isn´t it?
To better understand, I'll first explain what causes the blur in our second image, and after that, we will deal with freezing the action of our first image. Trust me, it is much easier to understand how to freeze action, when you know what causes the blur.
The Shutter Speed Experiment
Before I talk too much, let´s make another experiment. First, we need to take control over shutter speed: put our camera in S-mode or Tv-mode (depending on your camera manufacturer) to enable shutter priority.

In shutter priority, you choose the shutter speed and the camera takes care about the rest.
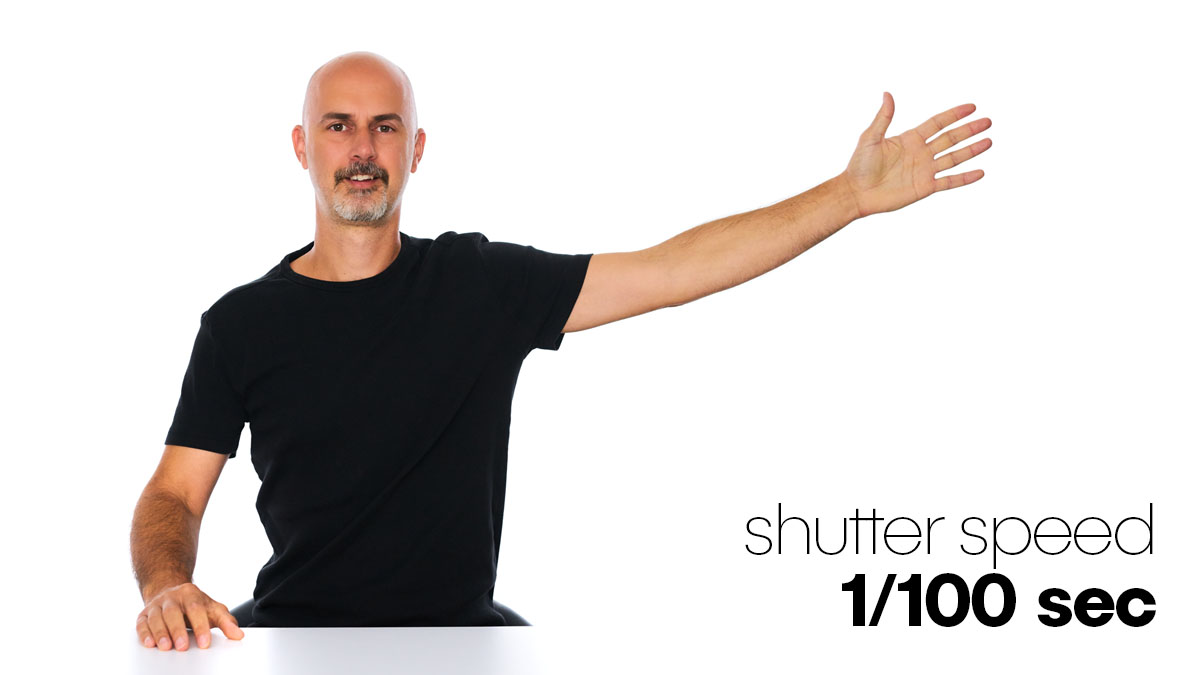
Our first image will be shot with a shutter speed of 1/100th of a second, so rotate your dial until you see 100 in your display. Note that some cameras will only show 100 and not 1/100th. Put the camera on a tripod, or on a table if you don´t have one. It is important, that the camera does not move during this experiment.
Note: knowing what to do in this experiment is much easier to understand by watching the video.
And now ask somebody to slowly raise his arm in front of the camera, while you press the shutter.
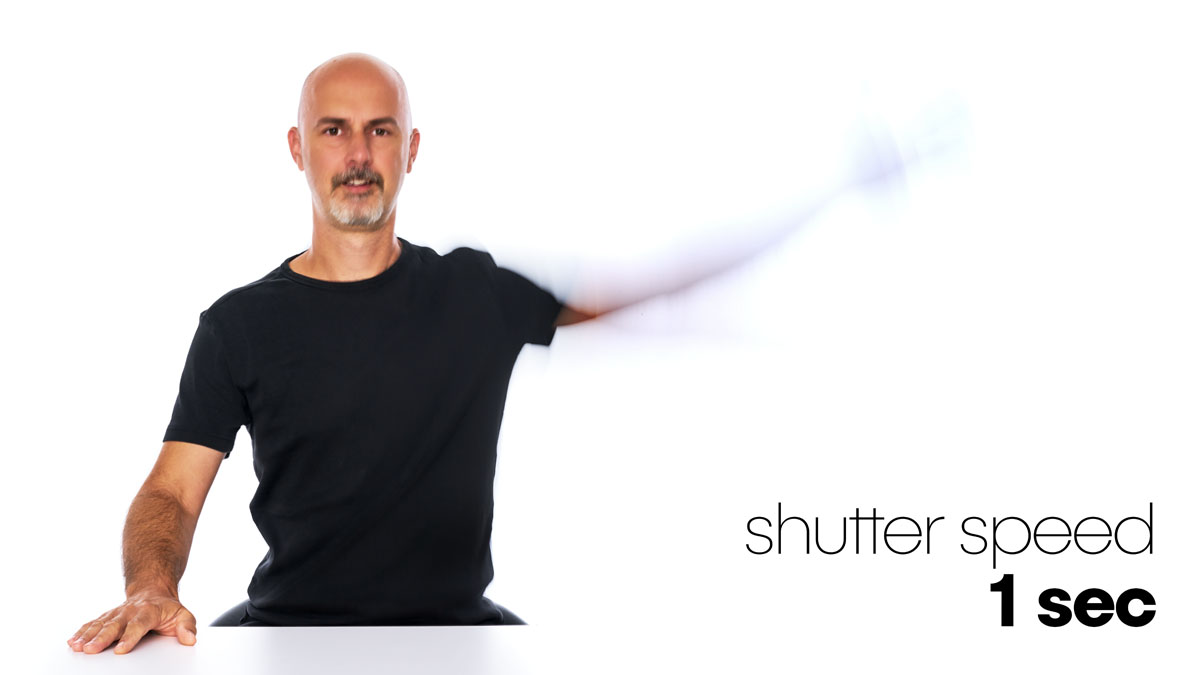
So far so good, for the second image set the shutter speed to one second. Make sure that the camera doesn´t move when you press the shutter and ask the person again to move the arm with the same speed.
Let´s look at the images. It doesn´t matter if your images are too bright, or too dark as long as you can see the same things I am talking about. The first image should look as expected, with your model and its raised arm.
But the second image should look totally different. The arm is a blurry mass.
But what exactly happened to our images, and how can you use these effects to your advantage?
Stay tuned – we´ll discuss that in the next three movies.
QUESTIONS? Please don´t hesitate to post in the comments on youtube
NEXT LESSON: 2.5. The Effects of Shutter Speed - Part II