Read the transcript to the above video:
Our third effect of aperture deals with portrait photography.
You sure know this kind of images where the background behind a person is totally blurred, and the person stands out.
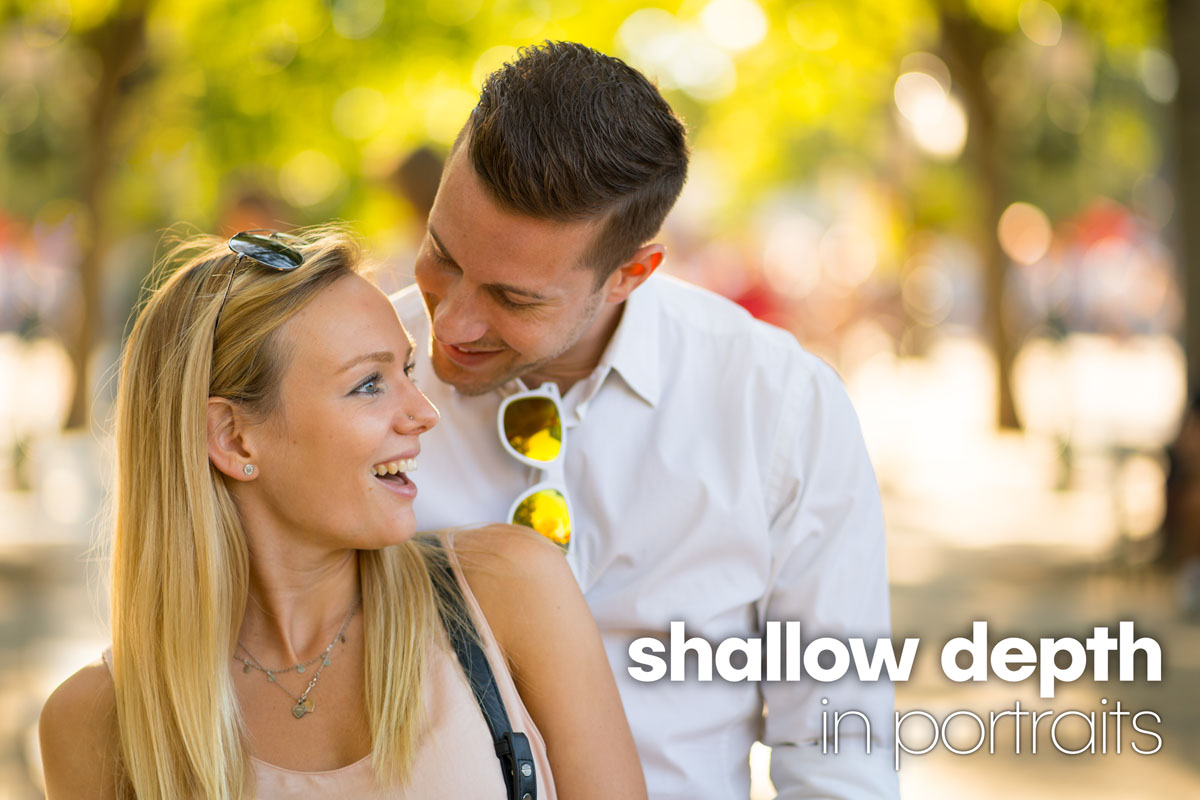
When we want a blurred background like this, what do you think: are we looking for a big, or a small depth?
We need a small depth because we want the focus area to be very shallow. And with the small depth, we need a small f-stop.
You see, once you understand the system, everything is pretty easy. For portraits, we usually want the area of focus to be as small as possible. So we take the smallest f-stop our lens offers, and dial the number all the way down.
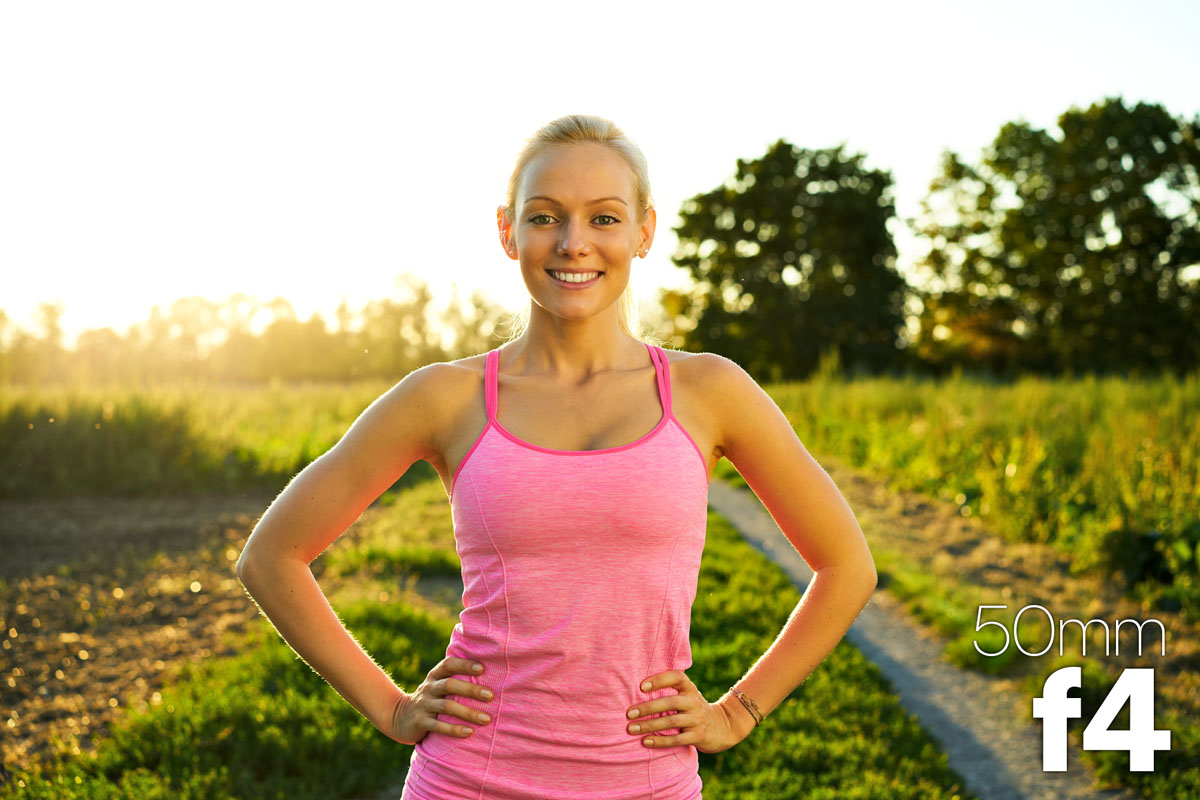
To finish our Effects of Aperture series, let´s compare a few images. Here is a portrait captured with a 50mm lens at f4. Take a close look at the background.
And here is the same portrait at f1.8.
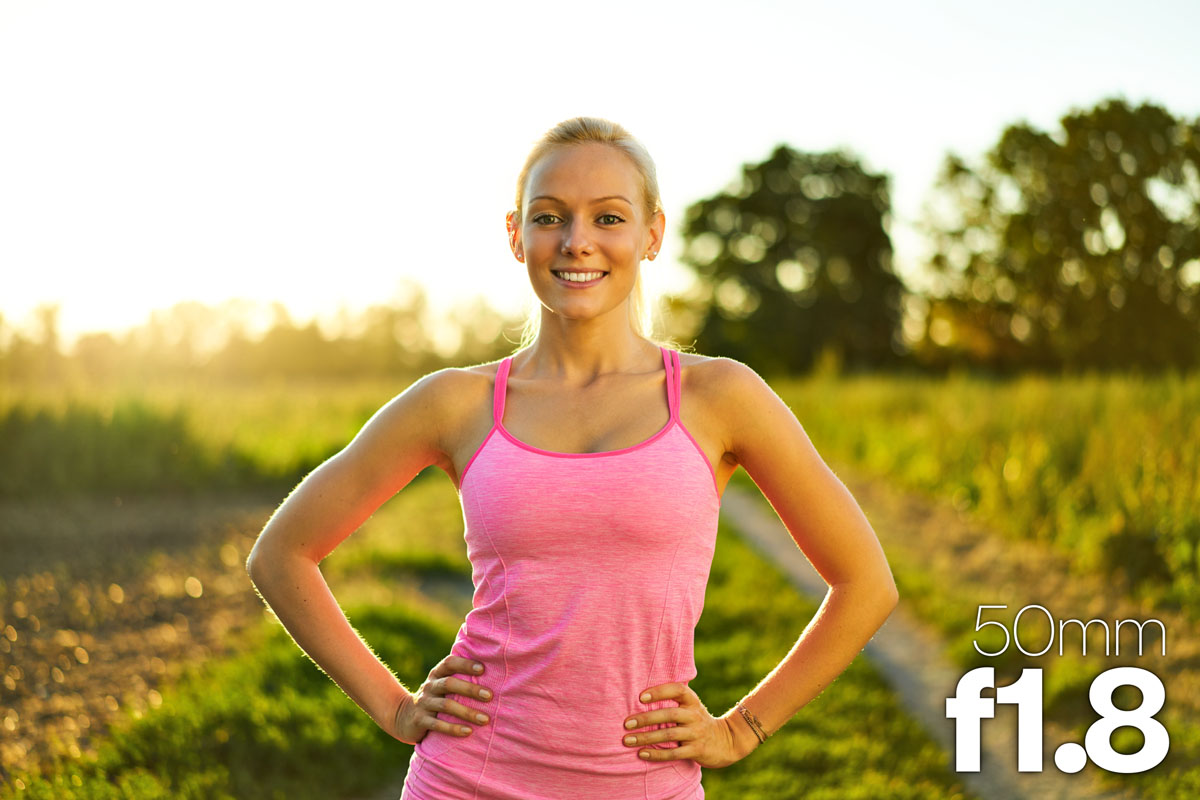
Small f-stop, small depth.
You´ll probably find out, that your lens doesn´t support f1.8 – every lens has a different maximum aperture, we´ll get to that in a later movie.
But if you have a telephoto lens, you can get the same effect with a bigger f-stop. So now it get´s even better, let´s use a 200mm telephoto lens.
First try at f11.
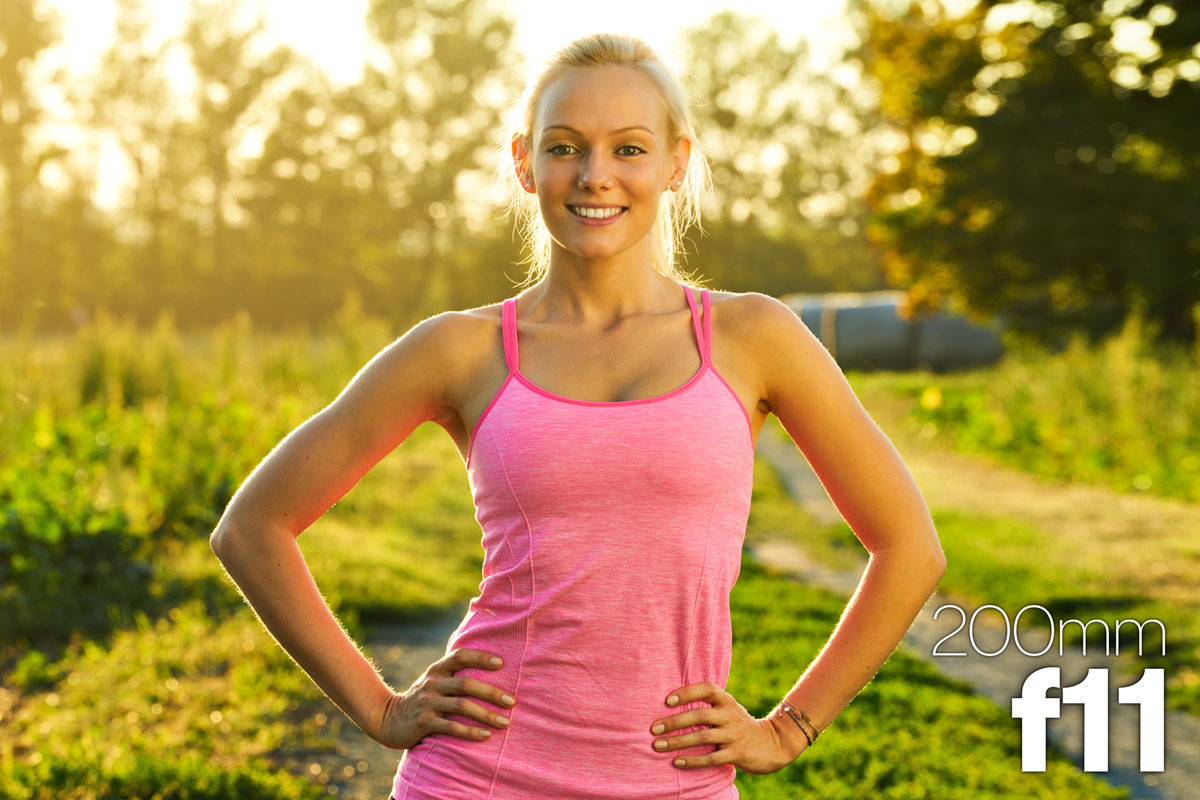
Not bad, is it?
that is similar to the result we´ve got with the 50mm lens at f1.8
But it gets even better right now – here is our final image at f4.
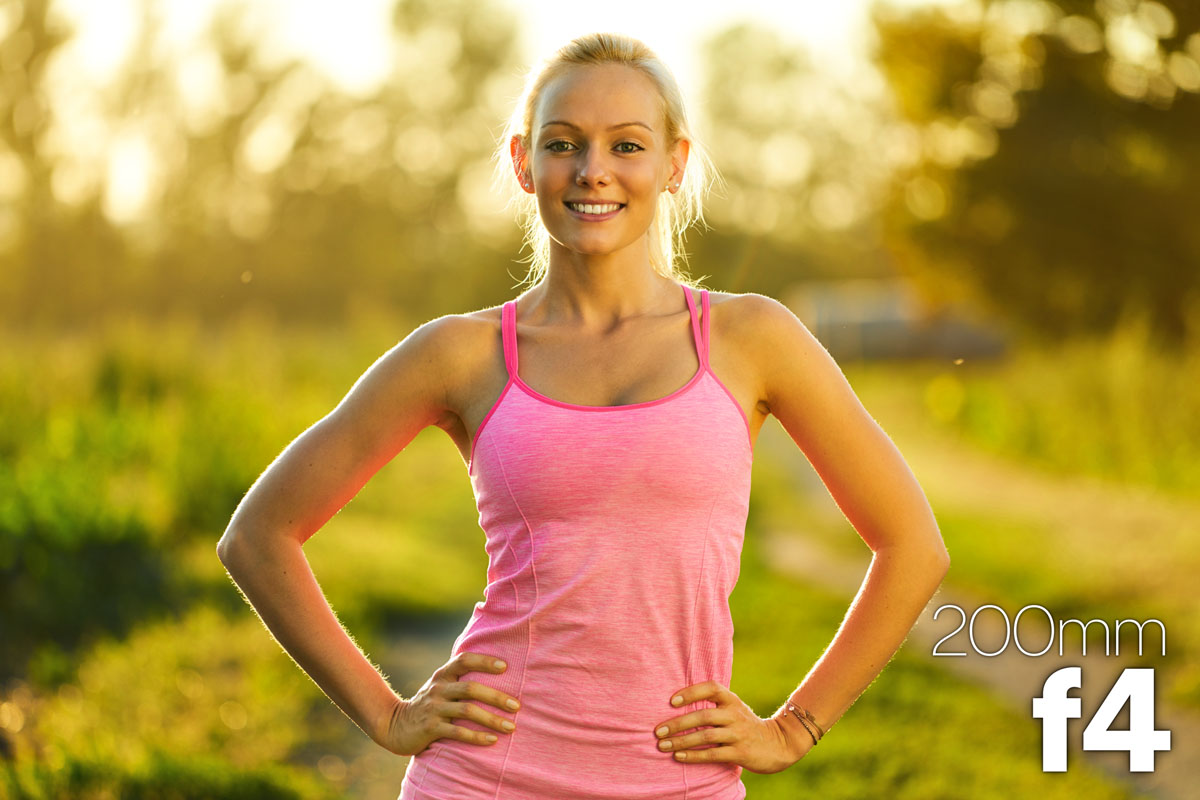
What a cool blurred background!
Btw: photographers call the quality of the blur bokeh.
Now you took a biiiiiiig step towards creating better images.
With our last example, you have seen that the background not only blurs more when you use a smaller f-stop but also when you use a telephoto lens.
There are two more factors that can increase the blur in portraits – or in other images. We will dedicate a movie to this very important aspect of photography in another movie later in our course.
But for the moment we are all happy that we finally understand and work with – aperture.
If you are still not quite sure, repeat the chapter. A single repetition just takes a few minutes and will do wonders for your learning curve.
And to even increase the learning curve, get your camera and shoot, shoot, shoot. If you don´t have a model at hand, use your pet, a football, a vase, whatever. The less your object moves and talks, the easier you can compare what effects various apertures have on your images.
Once you´ve shot and compared 100 images with different apertures, you won´t even have to think anymore – promised.
Next, we´ll take a closer look at the effects of shutter speed. I bet you´re totally excited.
QUESTIONS? Please don´t hesitate to post in the comments on youtube
NEXT LESSON: 2.4. The Effects of Shutter Speed - Part I